Create an OSN Bucket
OSN projects have an associated OSN Network Quota (TB) resource that represents the total storage that project can use. However, one project can have many S3 Buckets as long as the total quota doesn’t exceed the project network quota.
info
Prepare for your OSN bucket request
Before you open a request, gather the following information:
- Bucket name: OSN follows the AWS S3 bucket naming rules. Within those guidelines, choose a bucket name that is easy to remember, descriptive, and unique. For example, if a genomics project needs an S3 bucket to publicly share data, a good name may be
procyon-lotor-genome-public. The team should avoid generic names (such asdata-bucket) or names that don’t adhere to S3 conventions (such asProcyon Lotor Genomesince it has spaces and capitals). - Bucket quota: OSN buckets are measured in terabytes. The sum of all bucket quotas under a project can’t exceed the project network quota, but bucket quotas can be any size in whole terabytes below that.
- Bucket use description: Decide what your bucket is intended to do.
- (Optional) Public (anonymous) access: By default, OSN buckets are restricted to users who have access to either the Read Only key pair or the Read Write key pair. If your bucket should be accessible without authentication, please make a note.
- (Optional) Pod or Pod Location: You can a request a specific OSN pod or geographic location. While we can’t guarantee placement on a specific pod, we will do our best to accommodate your request. (Pod host requests will always be placed on their pod).
Request an OSN bucket
In the OSN portal, select the project to associate your new bucket with. Then, follow these steps to request a new bucket allocation.
- Scroll to the Allocations section on the project detail page.
- Click the Request Resource Allocation button.

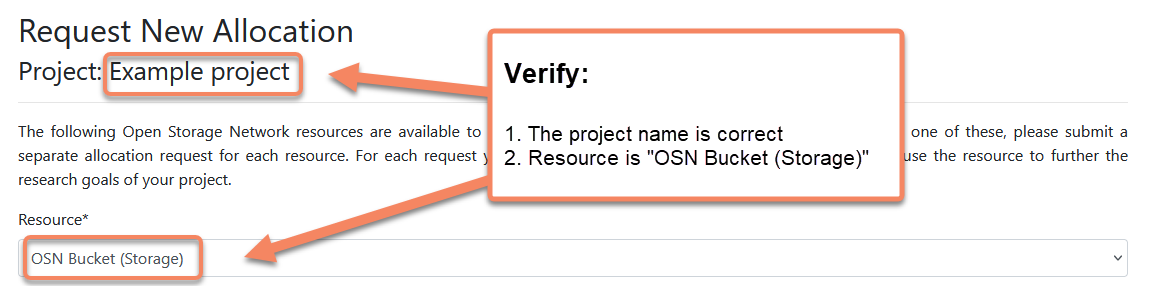
- On the next form, verify that the project name matches the expected project and the
resource says “OSN Bucket (Storage).”
- In the Description field, enter the information gathered in the preparation section, including bucket name, description, whether you need public access, and any pod preference.
- In the TB field, enter the requested bucket quota in terabytes.
- Under Users, select the check boxes next to all project users who should have access to view this bucket’s keys.
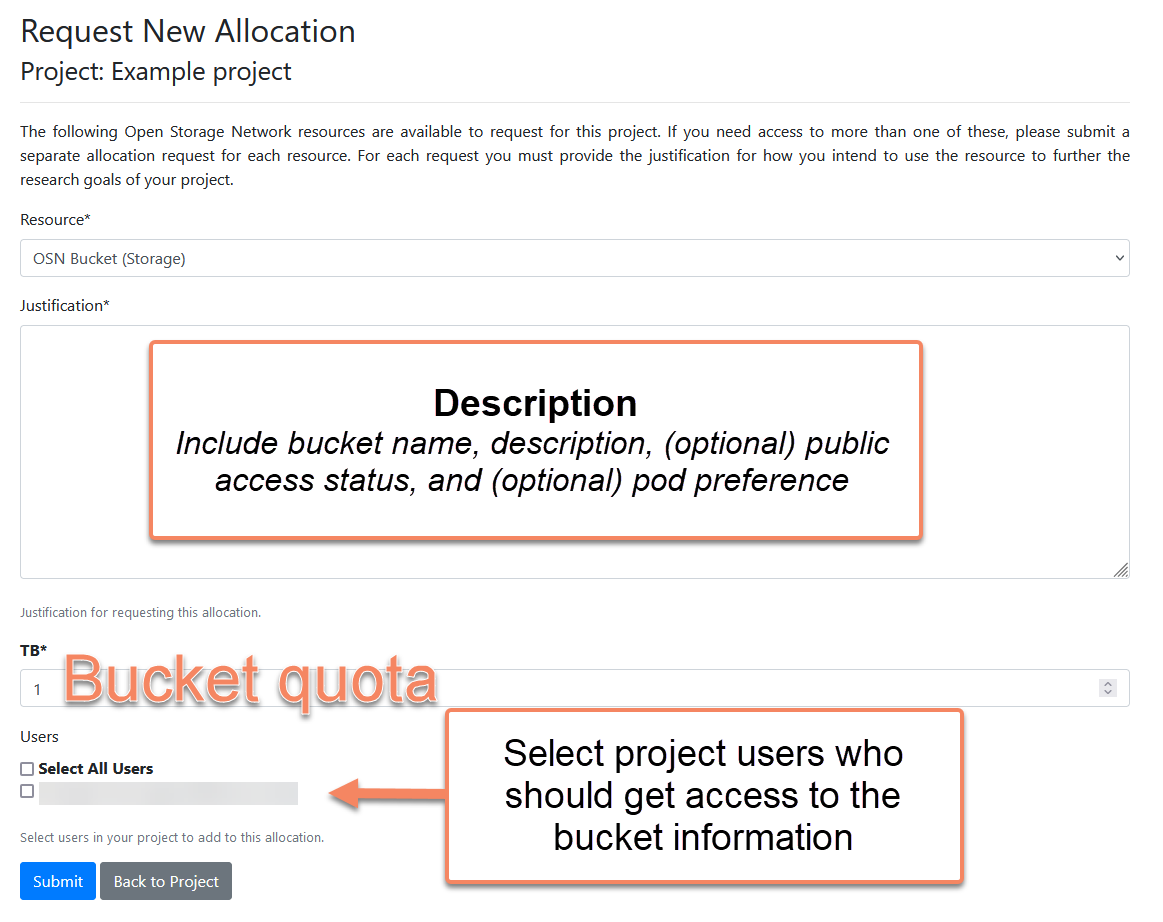
- Click “Submit” to finalize your request.
After you submit your bucket request, please allow two business days for the OSN team to review and approve your request. Once approved, you’ll receive a confirmation email and your bucket allocation page will contain your new bucket keys and endpoint.
Bucket attributes
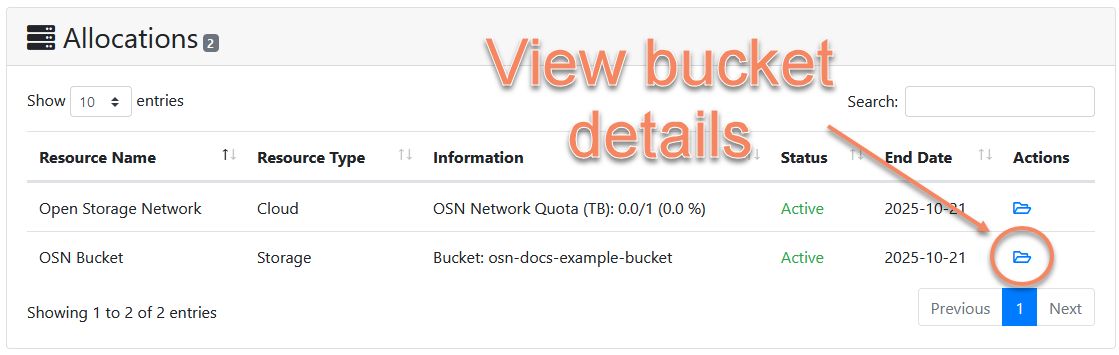
Each OSN bucket has several important attributes that you need to read and write data. To view a bucket’s attributes, navigate to the Allocations section on the project page and click the blue folder next to the bucket.
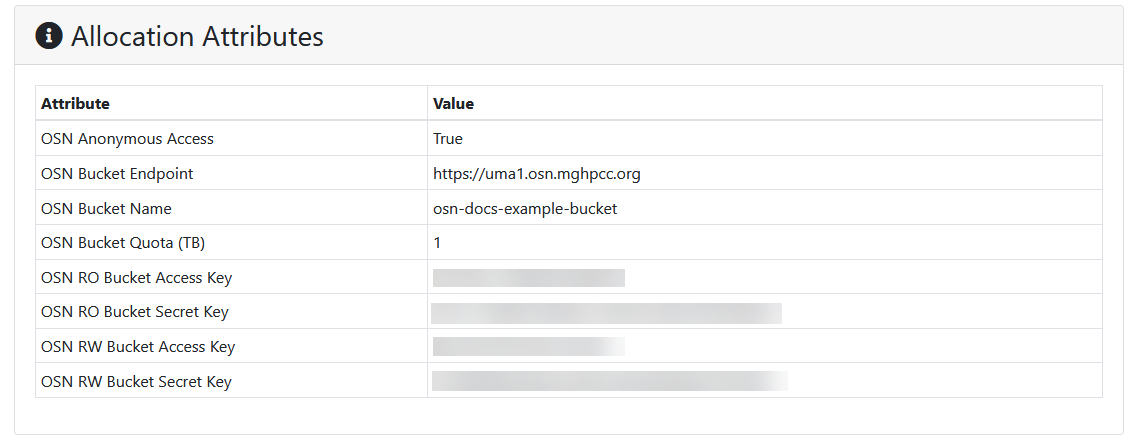
On the bucket detail page, scroll to the Allocation Attributes section to see your bucket attributes. Each bucket has the following attributes:
- OSN Anonymous Access: (True / False) determines whether the bucket accepts anonymous (keyless) read access.
- OSN Bucket Endpoint: (URL) the address of the server which hosts the bucket.
- OSN Bucket Name: the name of the OSN bucket.
- OSN Bucket Quota (TB): how much storage capacity the bucket has, in terabytes.
- OSN RO Bucket Access Key / Secret: the access key pair for read only access.
- OSN RW Bucket Access Key / Secret: the access key pair for read and write access.
Sharing credentials
You can share keys with other users either by incorporating the new user into the OSN portal project, or by copying the endpoint, bucket name, and access keys and secrets into whatever secure mechanism your group or project uses to handle secrets or protected data.